19 Best Effective Fitness Exercise
Authored by
Reviewed by


Fitness exercises are actions and movements performed to remain healthy and fit or to practice a specific physical activity (Collins Dictionary). Perfect physical fitness refers to the ability of the body systems to work together with perfect efficiency to allow a healthy life and smooth running of daily activities. Fitness exercises are important as they improve overall health, lower the risk of diseases, improve activity and mobility, lower the risk of injuries, and improve life expectancy and overall quality of life.
Everyone desires fitness, and there are many ways to achieve it. It needs a combination of exercises, nutritional management and lifestyle modifications. For many people, the challenges associated with the weight loss and fitness journey are overwhelming. The fitness experts advise starting with basic and easy exercises and gradually adding to the workout. Exercises that target a large group of muscles are more effective. Below are 19 effective workouts, procedures, and good workout routines that are excellent for fitness and overall health. The at-home exercises improve strength, flexibility and stamina and require minimum to no equipment or guidance from a fitness trainer. It is better to add such exercises to the daily routine.
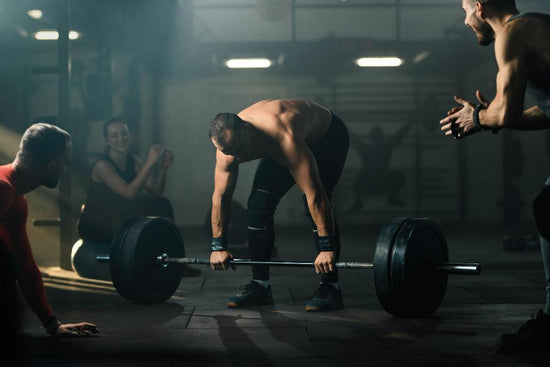
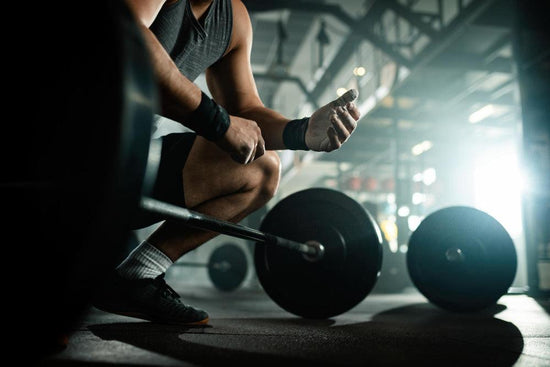
The squat is a strength exercise in which a person lowers his hips from a standing position and then stands back. The squats help strengthen the hip muscles. During the descending phase, the knee and hip joints and muscles flex, and the ankle joint undergoes dorsiflexion. During the standing back phase, the knee and hip joints and muscles undergo extension, and the ankle joint undergoes plantar flexion (Silvio Lorenzetti, Swiss Federal Institute of Sport Magglingen).
It improves core strength and increases the size and strength of the lower body muscles. Various muscles in the abdomen are used in squats. The squats are either perfumed under the bodyweight (bodyweight squats) or by having a barbell on the back (barbell back squats).
Figure 1: An athlete performing the barbell back squats.
The procedure of a squat is completed in 6 steps.
A lunge refers to a body position in which one leg is placed forward with the foot flat and the knee bent, and the other second leg is positioned back. Many variations of lunges are present, but the basic mechanism is the same. Bodybuilders and athletes use it as a fitness exercise during sports performance training. It is practised as a part of the Asana regime of yoga. The rear leg is activated too. Various muscles engaged in a lunge are erector spinae, quadriceps, gluteals, soleus, gastrocnemius, hamstrings, multifidus, obliques and transverse abdominis.
Figure 2: A female performing the forward lunges.
The most common version of the lunges is the forward lunge which is carried out in the following steps; (Tine Alkjær, University of Copenhagen, Copenhagen, Denmark)
The procedure for a backward or reverse lunge is as follows;
The burpee is an exercise where a trainee completes squats with additional stands between the repeats. The palms of the hand are placed on the floor in front of the corresponding feet to move from standing to squatting. It engages the whole body and is employed in strength training. It is a very efficient exercise that combines strength with cardiovascular training. All of the body's musculature is used in the whole body's continuous activity. It isn't easy, but the experts have called it a worthy option (Georgiy Polevoy, Moscow Polytechnic University, Russia).
Figure 3: A woman doing burpees.
The steps are as follows; (Cleveland Clinic Health Essentials)
It starts from a standing position while the shoulders are kept at a shoulder apart. Keep the arms at the sides, take out the chest and straighten the back.
The second step is to drop into a squatting position. Bent the knees, drive them out slightly past the toes, and bring down the butt. Keep the feet flat on the floor, then place the palms in front of the feet.
Kick back the legs to achieve a high plank position while the whole body is in a straight line from heels to the shoulders. Lock up the arms, keep the head straight, and eyes in the forward direction.
Bent the elbows to bring the body towards the floor. It is just like the descending part of a push-up. Keep the body straight and the core tight.
Return to a high plank position while keeping the body straight.
Then, move back to the squat position. The legs are jumped forward, and the feet are held flat on the floor while landing. The position by the end of 6th step must be as in step 2.
Keep the arms up to make a jump toward the ceiling, then jump explosively and land on the starting position.
Now restart the process by moving back towards the first step.
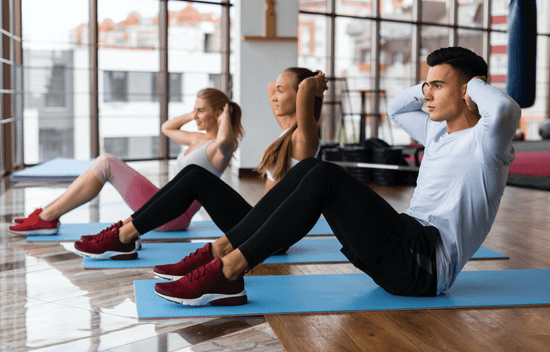
The abdominal crunches are the exercises that engage the rectus abdominis muscles to tighten the belly and achieve the famous six-pack abs. It is a cheaper, easy, home-based exercise that doesn't need any equipment and uses the body's weight to tone the muscles. Despite the variable results of studies, some experts like Du-Jin Park (Catholic University of Pusan, Korea) have recommended it, although it has a risk of back injury.
Various types of crunches are; the basic crunches that target only the rectus abdominis muscles; bicycle crunches that target the obliques muscles in addition to the rectus abdominis muscles; reverse crunches that target transverse abdominis (a deep muscle under the abs) in addition to the muscles targeted in the bicycle crunches and crossover crunches that target the obliques muscles and rectus abdominis muscles. There are many other less common variants.
The procedure of each type is different.
Basic crunches: Excessive tension on the neck muscles is avoided in the basic crunches. The trainee must place the head on the palms of their hands and image as if holding a tennis ball between their chest and chin. Then the chest is lifted while keeping the legs in place.
Figure 4: An athlete performing basic crunches.
The procedure is as follows;
Bicycle crunches: The fingertips are not clasped behind the head. Before achieving high speed, it is necessary to practice it thoroughly. The legs must be stretched fully while the elbows kept wide open.
Figure 5: An athlete performing the bicycle crunches.
The procedure is as follows;
Reverse crunches: The trainee must move slowly and use the abs for each step. Too much rolling must be avoided, and only the hips and the tailbone must be raised in the upward direction. As soon as more of the back starts losing contact with the floor, the activity is stopped. The steps are as follows;
Crossover crunches: A useful tip is to avoid working out the neck and imagine a tennis ball between the chest and chin. The abs must be engaged on the way upwards while the movements on the way down are controlled. Synchronisation with breathing is important. The procedure goes as follows;
Lie flat on the floor while the feet lie flat and hip-width apart. Bend the knees, place the fingertips behind the ears, and open the elbows.
Crossover the left leg to the right to allow the left ankle to rest on the right knee, and take a deep breath. Breathe out the air and keep the abs tight.
Raise the upper body off the mat to allow the right elbow to reach the left knee. The torso must be twisted to the left while the abs are squeezed.
Breathe in as the upper body slowly lowers to the mat.
Repeat the process for five rounds of 10-12 repeats each.
Side plank is a way to engage and strengthen two layers of muscles on the body's sides, known as the obliques muscles. These muscles are responsible for bending and rotating the trunk and protecting the spine. Working with the obliques is important to improve the strength and tone of the core, and side plank is included in the exercise plans of many professional athletes as it strengths a group of three distinct muscles at once, strengthens the core without overstressing the back, improves the balance and lower the risk of back injury (Angela Blasimann and colleagues, 2018).
Before performing, find a soft surface, e.g., a mat, to reduce stress on the feet and arms.
Figure 6: A man in the side plank position.
The procedure is as follows;
Some points to remember during the procedure are;
There are various plank variations, and once a person has practised the basic side plank, it is worth trying other variations. The definition and procedures of the three main variants are given below.
Elevated side plank: The elevated side plank puts more emphasis on the shoulder. It takes more work, depending on the strength of the core and upper body. The procedure is as follows;
The procedure is started from the same position as in the traditional side plank. The trainee is required to keep the core braced and the neck neutral. Now, the hips are lifted above the mat using the palms of hands that support under the lower shoulder, and the fingers must face away from the body. The top arm is extended towards the ceiling. The position is held for 15-60 seconds and repeated on the other side.
Figure 7: An athlete performing rotation side plank.
Rotation side plank: Adding rotation to the side plank engages the abs, glutes, lat muscles, shoulder muscles, and obliques. The procedure is as follows;
The procedure is started in the same position as the traditional side plank. The top arm is raised straight above the body. The arm is lowered, the core rotated, and the top arm is threaded through the space created under the body. Then the arm is unthreaded and returned to the starting position. The process is repeated 10-15 times and then repeated on the other side. A beginner is advised to start from 1 cycle per side and gradually aim to increase as the body gains strength.
Dipped side plank: It engages the shoulder, lat muscles in the upper back, glutes, and oblique muscles. The procedure is as follows;
The procedure is started from the same starting position as the traditional side plank. Then the top arm is raised slightly above, and the top hand is kept on the top hip. The hips are dropped until they reach the ground and are then returned to the starting position. The process is repeated 10-15 times on one side, and then the side is switched. The beginners are advised to start from just one cycle per side and gradually increase the intensity and number as the body gains strength.
Pushup or press up is a common exercise in which the arms are used to raise and lower the body on the floor repeatedly. The pushups activity exercises the triceps, pectoral and anterior deltoid muscles and provide additional benefits to the other nearby muscles (Iván Chulvi‐Medrano NowYou Personal Training Studio, Valencia, Spain).
It is a basic exercise used in military training, physical education and athletic training, and sometimes, it is used as a punishment sport in martial arts, school and the military. Various variants of pushups have been developing, e.g., incline pushups, decline pushups, bent knee pushups, stability ball pushups, medicine ball pushups, pushups with lat rows, clapping pushups and diamond pushups. The variants provide additional resistance and challenge and target more specific muscles.
Figure 8: An athlete performing pushups.
To perform a pushup, the trainee must be on the floor with all four limbs and hands slightly wider than the shoulders. The elbows are kept slightly bent and must not be locked out. The legs are extended back to balance the whole body on toes and hands, and the feet are hip-width apart. Once the position is achieved, the rest procedure is as follows;
In the bent knee pushup, the toes are replaced with the knees. In the incline pushup, a bench or a table is used using the same technique as a standard pushup, and it is easier and better to start for a beginner. In the core ball stability pushup, core stability work is added to increase effectiveness and difficulty. It is recommended after sufficient expertise in traditional pushups is achieved. In the decline mode, a table or box is used to raise the feet, adding to the resistance and challenge and the height of the box or table is adjusted according to the resistance requirement. In the clapping variant, more power is used while rising so that the hands come off the floor mat, and a clapping action is performed in mid-air. It has the risk of injury, particularly for beginners. The diamond pushups are used to target the bicep brachii muscles. The hands are closed together so that the thumb of one hand touches the index finger of the other hand to form a diamond shape on the floor. In the lat row variant, the dumbbell lat rows are added alternately to the top during each replication to increase the intensity. On the top side, the weight is pushed towards the chest and lowered towards the floor. In the medicine ball variant, the standard pushup is perfumed while placing one hand on the ball, improving balance and shoulder stability.
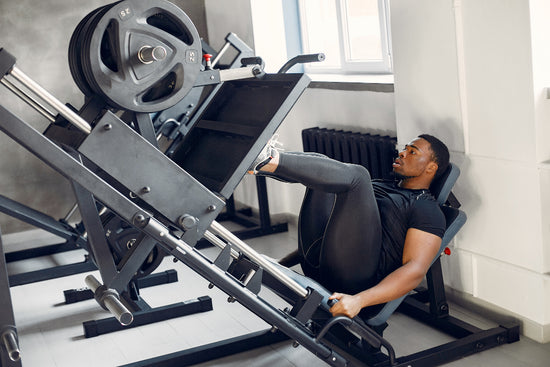
It is a popular exercise that targets the muscles in the lower back, gluteals and hamstrings. It is a traditional deadlift exercise variant with additional stability and balance challenge. It improves the strength of the core and spine. The single-leg variant involves lifting one leg off the ground and extending it behind the body. The extended leg strengthens the core muscles while standing on a single leg improves the balance. It is beneficial for unilateral sports movements (Wiktor Diamant, International Journal of Exercise Science, 2021).
Different variants are elevated rear foot single-leg variant, single-leg deadlift with support, bodyweight single-leg deadlift and single-leg deadlift with a resistance band and knee drive. There are several advanced variants which use various modifications to engage different muscles.
Figure 9: Single leg deadlift is really tough.
The procedure of a traditional single-leg deadlift is as follows;
Repeat the process as desired.
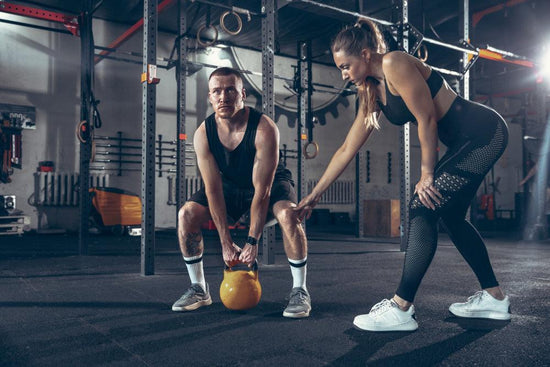
An overhead or shoulder press is an upper-body training exercise using weight. The trainee presses a weight like a dumbbell in the standing position. It targets and develops the anterior deltoid muscles in the shoulder. It was once a part of Olympic weightlifting but was removed in 1972, as it took a lot of work to judge the proper technique. The dumbbells, barbells or kettlebells are used to create a weight pressed overhead.
Figure 10: A man performing the overhead press.
Two versions are available; one is performed while standing and the other while sitting. The standing version is better as it engages more muscles to supper the lift. The procedure is as follows;
There are several different ways to perform the exercise (variants). They include the seated dumbbell overhead press, in which the actions are performed in a sitting position to stabilize better and support the back; the altering arms variant, in which both arms are not used and are altered; the hammer grip variant, in which the hand positions are changed to form a hammer grip, barbell overhead press in which the barbell is used instead of the dumbbells and the dumbbell squat to overhead press in which squat is added to the overhead press to engage both the lower and upper body simultaneously.
It is a common exercise that engages the upper body. The one-arm dumbbell row (or single-arm dumbbell row) is the most commonly used variant. It involves the bending forward motion of the hip while weighing one of the hands, and that weight is kept hanging towards the floor. The weight is pulled upward towards the chest and lowered to the starting position. The lower body and torso are not engaged and remain stationary as the movement mainly involves the shoulder blades. It engages various muscles in the upper back, e.g., latissimus dorsi, posterior deltoid, trapezium and rhomboid.
Figure 11: Dumbbell row uses just one dumbbell in one hand.
Before starting, achieving the right setup in which the trainee must bench at an incline of 45⁰ is helpful. It improves the alignment and ensures no additional stress on the back. Then, a dumbbell is grabbed in each hand, and the legs are adjusted to take one leg in front of the other. The next procedure is as follows;
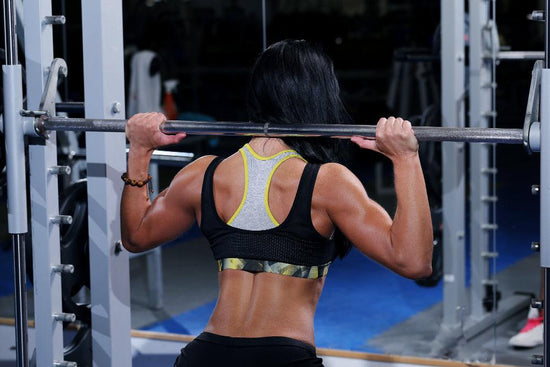
Barbell row or bent over row is one of the weight training exercises that improve the tone and strength of different muscles in the back. Different variants are available that target different sets of muscles. It is used both for powerlifting and bodybuilding. When adding it to the strength training exercise routine, choosing a weight that adds to the challenge is important. Various muscles targeted are the teres minor, teres major, latissimus dorsi, rhomboid, infraspinatus, trapezius and upper arms and chest muscles. It improves spine stability, and adding the dumbbells adds more resistance and helps burn calories. It is a highly functional and compound exercise, and bracing the abs and positioning the back is important to avoid unnecessary strain.
Figure 12: Playing with barbell is difficult but rewarding.
The procedure is as follows;
Various variants are used to fit the goals and the fitness level better. These are, bent over the dumbbell row in the lunge position, which adds hamstrings and glutes to the workout; single arm bent over the dumbbell row, which is unilateral movements on one side of the body at one time; and the barbell bent over row in which barbell is used as a weight and lifted by bending at 45⁰ and bracing the abs.
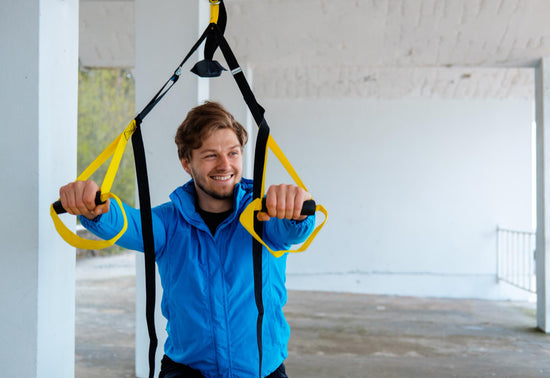
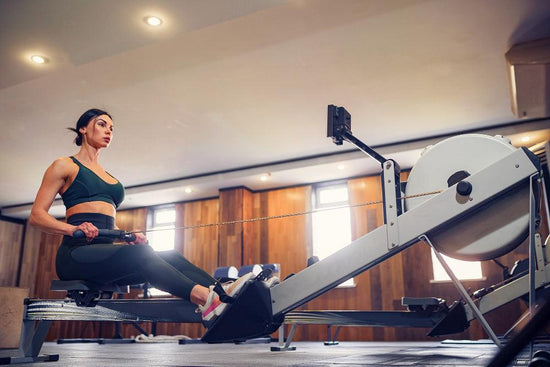
Interval training or high-intensity interval training (HIIT) is a category of training exercises in which high-intensity workouts are separated by periods of relief or rest. The high-intensity phase is anaerobic, while the recovery period is aerobic and of lower-intensity. It balances the activities and rest and allows beginners to gradually improve their fitness and stamina without being exhausted and overworked. Various variants are high-intensity interval training, sprint interval training and fartlek training.
It is based on the principle of adaptation and induces various physiological changes in the body, e.g., improved cardiovascular efficiency and better tolerance to lactic acid accumulation. The changes ultimately improve endurance, performance and speed. Some other benefits are better training without burnout, including cross-training in the exercise routine, more calorie burning, useful for people with medical conditions like metabolic diseases and COPD and avoidance of injuries common with the overuse of repetitive exercises (Christopher Hurst and Colleagues, 2019, Frontiers in Physiology).
It includes both the aerobic and anaerobic components. During the high-intensity phase, the glycogen stored in the muscles is used anaerobically for physical activities. The anaerobic activities don't need oxygen and generate lactic acid as a by-product. Due to the accumulation of lactic acid, an oxygen deficit is created. During the recovery phases, the lungs and heart work together to eliminate the oxygen deficit, and the breakdown of lactic acid occurs. Aerobic respiration is activated, which uses oxygen to generate energy from the stored carbohydrates. Over time, the body starts to learn the more efficient burning of lactic acid, allowing the athletes to perform for a long time without being slowed down by pain and fatigue.
Figure 13: The rest interval allows the body to recover.
The length of recovery and activity period is variable depending upon the choice. The procedure of both phases is as follows;
An example procedure is;
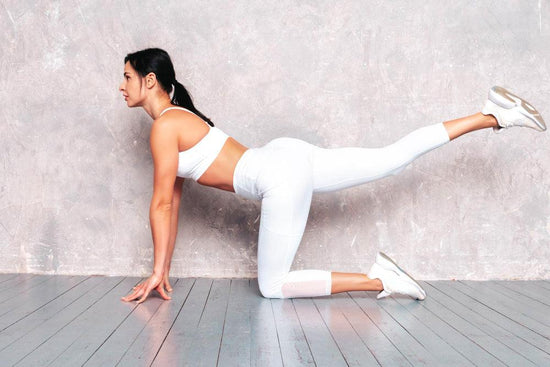
The glute bridge exercise strengthens the hamstrings (present on the back of the thigh) and the glute (butt) and improves core stability. It is a warm-up, strength, and rehabilitation exercise for spine stability and core improvement (B.J. Lehecka, DPT, International Journal of Sports Physical Therapy).
Different variants of glute bridges are chosen, considering factors like exercise goals and fitness levels. They are elevated feet in which some support is placed under the feet; straightened legs, in which an exercise ball is added to support the legs; single leg bridge in which one of the legs is used at one time either using or without using the exercise balls; bridge march in which one of the legs is lifted one time and brought to the core and then lowered and the process repeated for the other leg and the single leg bridge exercise with the lowered leg which adds more intensity by adding the leg movement while the pelvis is still in the raised position.
Figure 14: An illustration of glute bridge.
The procedure is as follows;
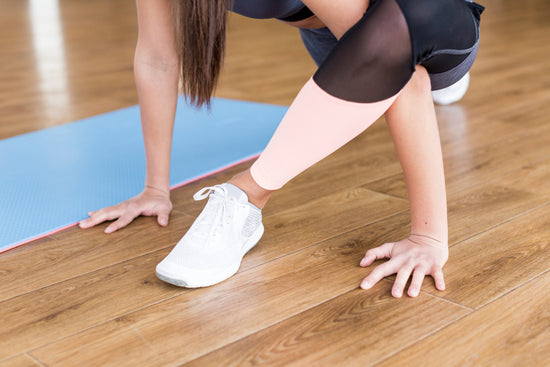
Knee tuck is a core exercise that targets the hip flexors and abs using the body's weight. The main muscles targeted in the knee tucks are rectus abdominis, known as abs, iliacus, psoas major (hip flexors), quadriceps (thigh muscles), external and internal obliques (the waist muscles) and the transverse abdominis. The major benefits of knee tucks are that they are doable anytime and anywhere, there is no requirement for equipment and warm-up or setup time, and they cause an excellent engagement of core and hip flexors.
Figure 15: An athlete performing knee exercise.
The procedure is as follows;
It is the basic procedure and has been modified to develop many variants. These are bench knee tucks, in which the bench is used to add more challenge and increase the range of motions; twisting knee tucks, in which a twist is added to engage the obliques; V-ups or V- sit-ups or just V-sits in which the body is turned into a loose V shape for more challenge; double crunch, in which spinal flexion is added to cause greater activation of rectus abdominis; hollow holds, to better work the hip flexors; rollouts, that includes lat muscles in the workout and the hanging knee raises in which entire weight is lifted on the legs and are much more challenging.
Pike rollout, or the Swiss ball pike rollout, uses a fitness or stability ball to exercise the abs. They are simple and performed with minimal equipment. Besides the abs, the pike rollout targets the triceps, shoulders, quads, obliques, lower back, hip flexors, glutes and muscles in the forearm.
Figure 16: A senior woman rolling over the Swiss ball.
The procedure of a basic Swiss ball pike rollout is as follows;
Try to keep the torso perpendicular to the ground during the pike position. The exercise becomes more and more harder as the ball is moved more and more away from the face.
Various other variants carry out the process in different ways, e.g., weighted vest to add to the resistance, adjust the distance between the ball and the face to change the degree of challenge and resistance, and some other variants perform it against the wall so that the back is parallel to the wall while in the pike position.
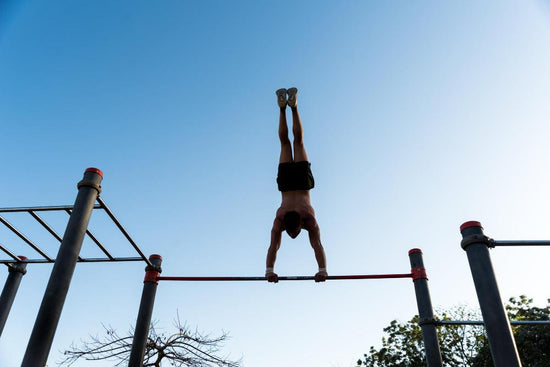
Crow stand, or crow pose, is an arm balancing yoga pose known as "Kakasana". It exercises the arms, legs and upper back and improves the tone and strength of the muscles. In addition, many spiritual and mental health benefits are associated with exercise. The name is of Indian origin and is derived from the Sanskrit words "kaka", which means crow, and "asana", which means the position. In the crow pose, the hands are placed on the floor, the shins are rested in the upper arms, and the feet are lifted to achieve the shape of a sitting crow (The Yoga Journal, 2021).
Despite the claimed spiritual and mental health benefits, some other potential benefits are better quality of life and health, better management of persistent pelvic discomfort in women and improved sleep, particularly for cancer survivors.
Figure 17: A woman performing the crow stand.
The procedure is as follows;
Some useful tips for a crew stand are; to achieve a strong foundation and improve the basic strength before practising; contract the midline using the abductor muscles to facilitate the lift; use the locks or Bandhas which allow or constrain the flow of energy (consult with the yoga tutor); round the spine to activate the core and improve the physical wellbeing and elevate the glutes and keep the eyes in the forward direction. It is not advised for people with a hip injury, pregnant women, those having any physical discomfort, e.g., carpal tunnel syndrome, migraine or tiredness and women during the menses.
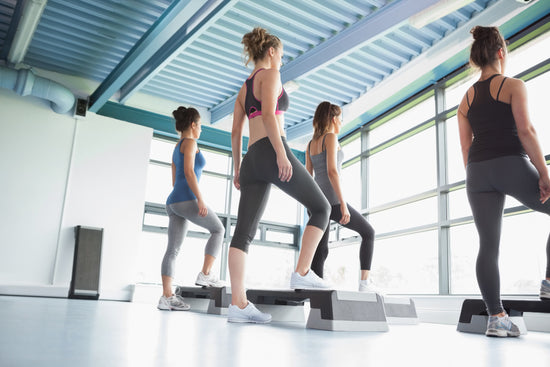
Walking is the first and most important step in the fitness journey. It is done anytime and anywhere, from walking to school or the workplace, in the parks or marching on the chair to challenge the body. However, walking as a workout is different from routine walking. The workout walk is a series of steps taken at the designated time, for a particular time interval and place, like the walking track in a public park.
Walking is an aerobic exercise of moderate intensity that increases the breathing and heart rate depending upon the degree of intensity. There are various recommendations, but most experts agree that walking less than 5,000 steps daily is a sign of a sedentary lifestyle, and adults must aim for at least 10,000 steps per day (2,000 standard steps are equal to one mile).
There are different types of walks, and each has a different procedure. Some major types are;
Causal stroll: It is suitable for anyone, both as a routine or just for fun. It is easily doable in all weathers, alone or with some family member or friend. No special equipment is needed except the tracksuit or joggers, which are personal choices.
Brisk walk: It is moderately fast and faster than the normal walk. It is suitable for everyone, particularly those who want to warm up or prepare for more challenging exercises.
Hiking: Hiking is a more challenging walk done on natural walkways, trails and along the hills and is of longer distance and duration than the normal walk. It is for people with better endurance and fitness who want to improve their health.
Trail walking: It is done on walking paths along woodland, parks, coastline and forests and is excellent for people who want to enjoy nature with the benefits of walking.
Power walking: It is very fast walking without any breaks. The arms propel the body forward, and the core is kept engaged. It needs skill and technique and has more benefits than the slower types.
Figure 18: A woman engaged in the Nordic walk.
Hillwalking: It is performed in mountainous and hilly terrain with some degree of gradient. The degree of the gradient is based on the fitness level. It is better for people with better stamina and endurance.
Race walking: It is done at high speed while following strict rules like constantly keeping one foot on the ground. It is a high-challenge walk and is suitable for athletes who want to compete in running competitions and is a test of endurance and speed limits.
Nordic walk: The Nordic walk uses specially designed poles. It is a more comprehensive walk as the upper body is engaged during the motion. It suits people of all fitness and ages and has numerous health benefits.
Swimming is a complex activity in which the coordinated movements of arms and legs propel the body through the water. The water offers more resistance to motion than the air due to its high viscosity, so swimming needs more effort and energy than walking. So, stronger muscles are required to perform the swimming. It is primarily a cardiovascular exercise and pushes the cardiac capacity to its limits.
Swimming is a complex technique; just pushing and splashing into the water is insufficient, and leisurely swimming for some time is enough to have some benefits. The workout swim is a more advanced type and has many set targets. It engages most of the muscles in the body and strengthens them. The primary muscles involved are the muscles in the abdomen, chest, shoulder, legs, back and hips (Klaus Wirth, University of Applied Sciences Wiener Neustadt, Austria).
Various benefits of swimming are better heart health, less joint pains, weight loss and better control of blood sugar and pressure. There are various swimming strokes, e.g., freestyle, butterfly and breaststroke etc., but the following guidelines help in all strokes.
Some key tips for success are joining a swimming club and taking instructions from the swimming coach, practising drills on each specific stroke of the swimming, watching video illustrations of each stroke, taking care of breathing and practising as much as possible.
Figure 19: A girl swimming.
The procedure for some important strokes is as follows;
Breaststroke
Various phases of the breaststroke cycle are pulling, breathing, kicking and gliding.
Butterfly stroke
It is a complex stroke and needs better coordination. First of all, practice the wave-like body movements.
Running is an activity which involves propelling the body forward in a rapid way on the foot. It's different from the walk. During walking, one foot always rests on the ground, but running occurs when both feet are above the ground. It makes running a high-impact sport. Running is either aerobic, anaerobic or both. The heart rate and oxygen intake remain consistent in the aerobic type, while the anaerobic type involves rapid bursts of activity for a short time.
The experts suggest that a person must work for 16-24 weeks to build the base for proper aerobic running, and then the anaerobic sprints help improve the performance. The health benefits include better energy levels and mood, better concentration and memory, improved respiratory functions, increased muscular health, stronger heart, increased bone density, reduced risk of chronic diseases and better and longer life.
Figure 20: Running engages most of the body muscles.
The prerequisite to follow a running program is to build endurance beforehand by jogging and walking. So, start with a brisk walk for some time to warm up for 10-15 minutes and after warming up, try jogging. Jogging is running at a lower, more relaxed pace requiring minimal exertion. Just a few minutes of jogging are enough. After that, move back to walking as soon as breathing becomes normal. Take another cycle of jogging for a short time, followed by walking. The length of intervals is person specific and depends upon the individual fitness levels, but the intervals are gradually increased.
A few days of practice are enough to allow running for a short time and aim to achieve a running period of at least 15 minutes. Now, the conditions are complete to follow a more rigorous training program. Practising too much in too short a time and too rapidly increases the risk of injuries.
Fitness exercises are physical activities to maintain or improve a person's health, fitness and overall well-being. Such exercises focus on various aspects of fitness, e.g., body composition, flexibility, muscular strength and cardiovascular endurance (Public Health Reports, 1985).
Several types of exercises qualify as fitness exercises, e.g.,
The choice of an ideal fitness exercise is based on many health-related and personal factors and must be consulted with the doctor or fitness trainer.
Fitness exercises are important for physical and mental health for various reasons. The benefits are too many to be summarised in a paragraph. Some of them are;
Better physical health: Improving blood circulation and cardiac functions reduces the risk of many chronic and deadly diseases, e.g., hypertension, heart diseases, type 2 diabetes, some types of cancers and diabetes. It results in a better quality of life (QOL) and low mortality rates, as Pawel Posadzki and colleagues noted in 2020 (BMC Public Health).
Ideal weight management: Regular fitness exercises allow one to burn excessive calories and maintain ideal weight and BMI. It is important as obesity opens the door to many diseases. Regular fitness exercises for 150 mins/ week help maintain and improve health, while 225-420 mins/ week cause significant weight loss (Damon L. Swift, PhD).
Better bone health and muscular strength: The strength and fitness exercises improve lean mass, bone health and metabolism. It reduces the risk of injuries and allows a better posture.
Better flexibility: The fitness exercises, particularly flexibility exercises, improve the muscles' elasticity and thus reduce the risk of injuries.
Mental health benefits: Fitness exercises cause the release of endorphins, the pleasure hormones that improve mood, alleviate anxiety and stress and improve sleep quality. Consequently, the risk of mental health conditions in people engaged in regular fitness exercises is low. Moreover, the sense of achievement of fitness goals and improvement of physical appearance boosts self-confidence. It improves social relationships with added benefits. There are benefits related to memory, problem-solving skills and attention (Cornelia Herbert and colleagues, 2020).
Better coordination and balance: The stability exercises reduce the risk of falls, particularly in adults, by improving stability and coordination. Such exercises emphasise core strength and balance, improving alignment and posture and reducing the risk of musculoskeletal problems.
Better immunity: The fitness exercises improve immune functions by improving blood circulation and inflammation.
Longer life: The ultimate end of all benefits is a better and longer life, and studies have shown that people engaged in fitness exercises for longer times have a better and longer life. People engaged in regular physical activities have a 30-35% lower mortality rate due to all causes (Journal of Aging Health, 2012).
The purpose of fitness exercise is a subjective and personal matter. The choice depends upon individual health goals. Fitness exercises improve the quality of life and optimise health by influencing the physical, emotional and mental aspects. The key to success is to keep engaged persistently. People go for fitness exercises for one or more of the following purposes;
The benefits are too many to be listed completely. In short, engaging in fitness exercises benefits health irrespective of gender, age and health status.
Fitness exercises offer many benefits; regular physical and fitness exercises benefit overall health. Some well-known health benefits are;
The exact health benefits vary from person to person, and regular consultation with a doctor and fitness expert is important to get the maximum out of any exercise workout.
Fitness exercises are necessary due to various health benefits, and spending a few hours per week is a relatively low cost of enormous health benefits. These exercises improve cardiovascular health, help regulate metabolism, balance and flexibility, maintain bone health, improve the health and flexibility of joints and contribute to overall health, including mental health. The athletes need to exercise in fitness for better performance in athletic competitions. Remembering that a well-rounded and useful exercise plan must be tailored to individual needs is important, and not all exercises benefit everyone. Therefore, a person must choose the required fitness exercises with care.
Fitness Exercises deeply impact overall physical health, and the effects are noted in all body systems. The important physiological changes are better cardiovascular health resulting in a lower risk of heart diseases, e.g., stroke and heart attack; better endurance and macular strength that improve the ability to perform routine life activities and lower the risk of muscular injuries; better bone health with a lower risk of bone fractures and chronic conditions like osteoporosis; better metabolism and energy levels; control over the body composition and ability to manage the basal metabolic rate; flexibility of joints, tendons and ligaments and better physical balance; better joint health; better control over the blood parameters, e.g., pressure and glucose levels; better control over the cholesterol levels particularly the bad cholesterol (LDL); stimulation of the digestive process and prevention of issues like constipation; better health of immune systems resulting in lower inflammation and lower risk of some cancers.
Fitness exercises improve the ability of the body to manage pain and release stress-receiving and pleasure hormones. Moreover, the improved balance of hormones has wide-reaching effects. Remember that the impact of fitness exercises on physical health is variable and depends upon factors, e.g., genetics, health conditions, gender, age type and intensity of the exercises used. A well-rounded and customised exercise plan is needed to get the maximum benefits, and enrolling the help of concerned professionals is necessary.
Fitness exercises improve physical strength by influencing various strength-related parameters. The major effects on physical strength are;
Improved cardiac health: Fitness exercises improve cardiovascular health and circulation and help manage blood pressure. The increased cardiac efficiency allows more efficient blood pumping into various organs for better metabolism. The strength training exercises improve the endurance and strength of muscles.
Stronger muscles: The size of muscle fibres and the number of mitochondria (the powerhouse of cells) in each muscle fibre is increased. It allows the muscles to contract and relax with more power and speed without exhaustion. The increased bone density supports the muscles and reduces the risk of muscular and joint injuries.
Increased resting metabolic rate: Fitness exercises improve the resting metabolic rate. It allows more efficient energy production from the foods a person eats.
Improved mental well-being: The release of stress relievers, e.g. endorphins, is stimulated by fitness exercises, improving mental health and allowing a person to focus on physical work.
Weight management: An overweight person has to carry excessive weight while moving, resulting in exhaustion. The fitness exercise help shed extra fat, allowing better physical resilience and endurance.
Stronger and more flexible joints: Movement is about flexibility, joint health and lubrication, and fitness exercises target all movement-related factors.
Increased lung capacities and respiratory efficiency: Regular workouts increase lung capacities and thus provide more resistance to issues like shortness of breath and shortness, which often compromise fitness efforts. The other implications of fitness exercise, e.g., better sleep, better immunity and insulin sensitivity, all have a role in improving physical strength.
Stamina means the ability to perform a specific physical function without exhaustion or the physical or mental ability to sustain a prolonged and stressful activity or effort (Merriam Webster’s). Fitness exercises induce various changes in the body that increase stamina, e.g.,
Changes in the cardiovascular system: Regular fitness exercises result in a stronger heart with a better ability to pump blood. It improves the delivery of oxygen to the working muscles, which is used for energy production.
Better oxygen utilisation: For usage, oxygen has to enter the tissues and it happens through very fine blood vessels, the capillaries. Regular exercise for a long time increases the number of tissue capillaries, allowing more robust entry of oxygen and nutrients and better removal of wastes (Steven Romero and colleagues, Medicine and Science in Sports and Exercise, 2020).
More mitochondria in the muscle cells: Mitochondrial are the powerhouse of cells and are engaged in energy production. Fitness exercises increase the capacity and number of mitochondria in the muscle cells that cause better energy production.
Changes in muscle fibres: The muscle fibres change with regular fitness and strength training. They increase in size, particularly the slow twitch fibres undergoing more proliferation, which are more resilient to stress and exhaustion.
Respiratory adaptations: The high-intensity interval training (HIIT) and interval training aim to improve the utilisation of lactic acid produced from anaerobic respiration. Lactic acid accumulation in the muscles is responsible for soreness and muscle fatigue. Over time, the body learns to consume it faster.
Better energy utilisation: Regular fitness exercises help the body to use energy reserves from fat and glycogen. It is a common experience that first-time exercise causes severe exhaustion. However, regular exercises cause the mobilisation of energy reserves in the body and increase fatigue resistance.
Better lung functions: Fitness and strength training increases breathing efficiency and lung capacities and eventually overcomes the breathing issues experienced by beginners.
Better heat dissipation: Workout and metabolism produce heat which the body removes through sweating. Over time, the body improves heat dissipation by increasing the blood vessels and sweat glands in the skin.
Mental resilience: Regular workout improves the stress and discomfort of physical exertion and motivates a person better.
Workout is an exciting activity. However, some preparations before it improve the experience and allow a person to engage better. Some important things to consider before a workout are;
Yes, fitness Exercises are an important component of the weight loss journey, and their importance is second only to nutritional management. The mainstay of weight loss is creating a caloric deficit in which a person takes fewer calories and uses more. The fitness exercises help achieve it by burning calories. However, nutritional and dietary management is very important. The weight loss targets become difficult if a person takes in more calories than the exercise regime is able to burn. Combining a less caloric diet and exercises to burn extra calories works best.
Different exercises useful to lose weight include cardiovascular exercises, strength training, high-intensity interval training (HIIT), balance and flexibility training, and functional exercises.
All fitness exercises don't need the help of fitness trainers. Most fitness exercises mentioned above need minimal equipment, carry a lower risk of complication and injuries and are doable at home. However, joining a fitness training class or consulting a trainer provides many benefits, especially for beginners who need clarification on the purpose and goals. A trainer teaches different exercise techniques and the proper form required for each technique, provide personalised guides tailored to the individual needs, provide necessary motivation, develop a sense of accountability, monitor the progress, add more variety to the exercises to achieve a particular goal, teach safety measures to reduce the risk of injuries and educate about how to adapt to the different changes.
In the end, it is a matter of personal choice. While some people prefer to work with a trainer, others prefer to work independently and consult only in case of difficulty. The important thing is the safety of the trainer. Consulting professional trainers is a wise option if a person is unable to ensure safety while working independently.


Plus get the inside scoop on our latest content and updates in our monthly newsletter.